Unlock Flavor: The Secret to Perfect Dry Brined Roast Turkey
Imagine a holiday centerpiece that consistently delivers – a magnificent roast turkey with incredibly juicy, tender meat and shatteringly crisp, golden-brown skin. For too long, home cooks have grappled with dry, flavorless turkey or the messy, time-consuming ordeal of wet brining. But there's a simpler, more effective way to achieve poultry perfection: the **dry brined roast turkey**. This method, cherished by chefs and home cooks alike, transforms an ordinary bird into an extraordinary culinary triumph, making it the ultimate secret weapon for your holiday feast or any special occasion.
Dry brining isn't just a technique; it's a game-changer. By applying a salt rub directly to the turkey's surface and letting it rest, you're not merely seasoning the meat; you're fundamentally altering its texture, locking in moisture, and intensifying its natural flavors. Say goodbye to bland breasts and hello to an unforgettable eating experience that will have your guests raving.
The Science Behind the Magic: Why Dry Brining Beats the Rest
At its heart, dry brining is a marvel of culinary science, leveraging simple principles to deliver spectacular results. When you apply a generous, even coating of salt to your turkey, a fascinating process begins. Initially, the salt draws moisture out from the turkey's cells through osmosis. This surface moisture then dissolves the salt, creating a concentrated brine. Over time, this newly formed brine is reabsorbed back into the meat, carrying the salt deeper into the muscle fibers.
What happens next is crucial: the salt denatures the proteins within the turkey's meat. This alters their structure, allowing them to retain more moisture during the roasting process. The result? A remarkably juicy turkey, even the notoriously lean breast meat. Furthermore, the dry brining process helps to dry out the turkey's skin, a critical step that ensures it crisps up beautifully in the oven, rather than becoming rubbery. This combination of enhanced juiciness and crispy skin is precisely what makes the
Master the Dry Brine: Juicy, Crispy Roast Turkey Every Time method so effective.
Compared to traditional wet brining, dry brining offers several distinct advantages. There's no massive cooler of salty water to contend with, no risk of diluting the turkey's natural flavor, and importantly, no soggy skin. Wet brining often injects too much water into the meat, leading to a "puffy" texture and compromising skin crispness. Dry brining, conversely, concentrates flavor and ensures a truly outstanding texture. If you're still on the fence, we encourage you to
Skip the Soak: Why Dry Brining Beats Wet for Juicy Turkey to understand why this method reigns supreme.
Mastering the Dry Brine: Simple Steps to a Sensational Turkey
Achieving the perfect **dry brined roast turkey** is surprisingly straightforward, requiring more patience than complex technique. Here’s a step-by-step guide to ensure your turkey is destined for greatness:
1. Prep Your Turkey
- Thaw Completely: Ensure your turkey is fully thawed. A 12-15 lb turkey typically needs 3-4 days in the refrigerator.
- Remove Giblets: Take out the neck and giblets from both cavities. Save them for gravy!
- Pat Dry, Thoroughly: This is a crucial step. Use paper towels to pat the turkey dry, inside and out. The drier the surface, the better the salt will adhere and the crispier the skin will become.
2. Apply the Dry Brine
- The Salt: Use coarse kosher salt (Diamond Crystal or Morton's are great). A general rule of thumb is 1 tablespoon of kosher salt per 4-5 pounds of turkey. So, for a 15-pound bird, you’d use about 3-4 tablespoons.
- Optional Flavor Enhancers: For an extra layer of flavor, mix your salt with finely chopped fresh herbs (rosemary, thyme, sage), citrus zest (lemon or orange), black pepper, or a pinch of garlic powder.
- Brining Technique:
- Generously sprinkle the salt mixture all over the turkey – top, bottom, and inside the cavity.
- For even better results, gently loosen the skin over the breast and thighs and rub some of the salt directly onto the meat. This ensures the seasoning penetrates deeply.
- Massage the salt into the skin.
3. The Essential Chill
- Rest Uncovered: Place the dry-brined turkey on a rack set inside a rimmed baking sheet. This allows for air circulation.
- Refrigerate: Transfer the turkey to your refrigerator, uncovered, for 24 to 72 hours.
- 24 Hours: Good flavor penetration, decent skin crisping.
- 48 Hours: Excellent flavor and moisture, noticeably crispier skin.
- 72 Hours: Optimal results – deeply seasoned, incredibly juicy, and incredibly crisp skin.
- Why Uncovered? Leaving the turkey uncovered allows the skin to air-dry, which is the secret to achieving that coveted crackling crispness.
Roasting Your Dry Brined Turkey to Golden Perfection
After its essential dry brine rest, your turkey is primed for roasting. The hard work is done, and now it's time to bring out that magnificent golden-brown hue and incredibly tender meat.
1. Pre-Roast Preparation
- Rinsing (Optional, but Recommended): Some chefs advocate rinsing off the excess salt after brining, then patting the turkey thoroughly dry again. Others skip this step entirely, finding the salt absorbs sufficiently. If you're concerned about saltiness, a quick rinse won't hurt, but *always* pat it bone-dry afterward.
- Temper the Bird: Remove the turkey from the refrigerator about 1-2 hours before roasting. This allows it to come closer to room temperature, promoting more even cooking.
- Butter or Oil? Rub the entire turkey with olive oil or melted unsalted butter. This helps with browning and flavor. You can also slip a compound butter (butter mixed with herbs, garlic, and zest) under the breast skin for extra richness.
- Stuffing (or Not): For optimal even cooking and crispest skin, avoid stuffing the turkey cavity. Instead, fill it with aromatics like halved onions, lemons, garlic heads, and fresh herb sprigs. If you must stuff, do so loosely with hot stuffing just before roasting, and be aware it will increase roasting time.
- Trussing (Optional): Tying the legs together can help the turkey cook more evenly and present beautifully, but it's not strictly necessary for flavor or moisture.
2. Roasting Strategies
There are several popular methods for roasting a turkey; choose the one that suits your preference:
- High Heat Start: Preheat oven to 450°F (230°C). Roast for 30 minutes, then reduce temperature to 325°F (160°C) for the remainder of the cooking time. This helps to achieve crispy skin quickly.
- Consistent Lower Heat: Roast at 325-350°F (160-175°C) for the entire cooking time. This is a more gentle approach.
- Spatchcocking: For the ultimate crispy skin and even cooking, consider spatchcocking (butterflying) your turkey. This dramatically reduces cooking time and maximizes skin exposure to heat.
Regardless of the method, remember to place the turkey on a V-rack in a sturdy roasting pan. This elevates the bird, allowing heat to circulate all around it.
3. Monitor and Rest
- Temperature is Key: Begin checking the internal temperature with a reliable meat thermometer about two-thirds of the way through the estimated cooking time. Insert the thermometer into the thickest part of the thigh (without touching bone) and the thickest part of the breast.
- Target Temperatures: The turkey is done when the breast meat reaches 160-165°F (71-74°C) and the thigh meat reaches 170-175°F (77-79°C). Remember, the temperature will rise during resting.
- Don't Overcook: Overcooking is the enemy of a juicy turkey! Remove it from the oven *just* as it hits these target temperatures.
- The Essential Rest: Once removed from the oven, loosely tent the turkey with foil and let it rest for at least 20-30 minutes (or up to an hour for larger birds) before carving. This critical step allows the juices to redistribute throughout the meat, ensuring every slice is incredibly moist. Skipping this will result in juices running out onto your cutting board instead of staying in your turkey.
Troubleshooting and Pro Tips for Your Best Turkey Yet
Even with a reliable method like dry brining, a few extra tips can elevate your **dry brined roast turkey** from great to absolutely legendary.
*
Preventing Over-Browning: If your turkey skin is browning too quickly before the internal temperature is reached, loosely tent it with aluminum foil.
*
Even Browning: Rotate your roasting pan halfway through cooking if you notice uneven browning in your oven.
*
Basting? Basting the turkey is largely unnecessary with dry brining, as the method itself locks in moisture. Plus, opening the oven frequently drops the internal temperature, extending cooking time. If you want to add flavor, consider pouring pan drippings over the turkey during the last 30 minutes of roasting.
*
Don't Stuff with Cold Stuffing: If you absolutely must stuff your turkey, ensure the stuffing is hot before it goes in the cavity. Cold stuffing lowers the turkey's internal temperature and creates a food safety hazard. Better yet, bake your stuffing in a separate dish.
*
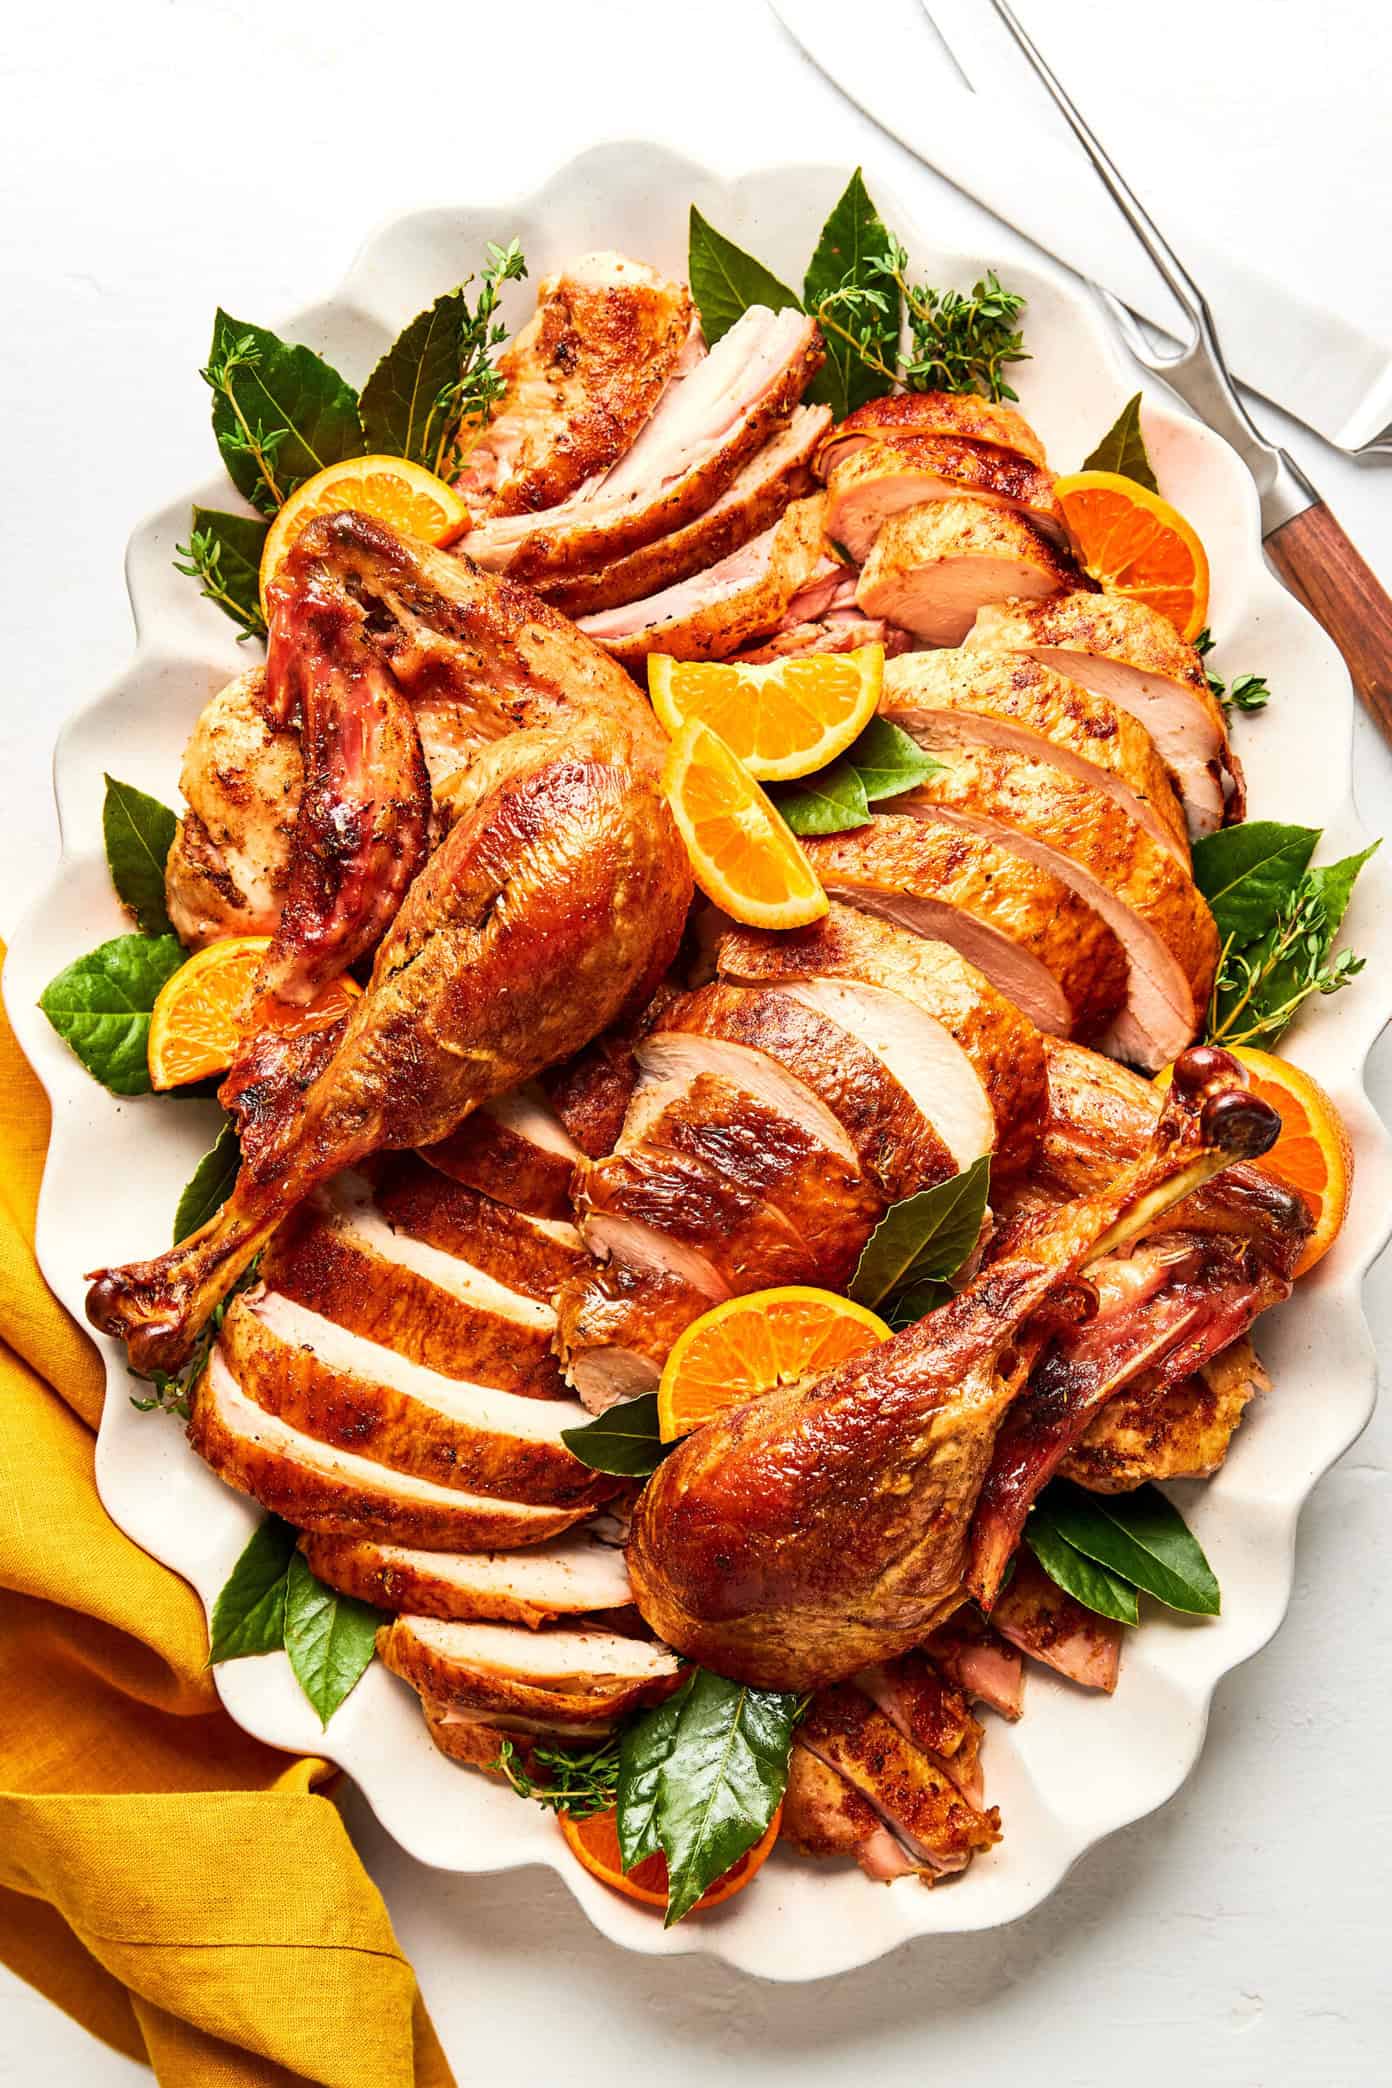
Carving with Confidence: Once rested, carve your turkey against the grain. Start by removing the legs and thighs, then the breast meat in large sections, and finally slice it into serving portions. This ensures maximum tenderness.
*
Compound Butter Boost: For an extra rich flavor and beautiful golden skin, rub a mixture of softened butter, fresh herbs (sage, thyme), garlic, and a pinch of salt under the skin of the turkey breast and thighs before roasting.
Conclusion
The journey to an effortlessly perfect roast turkey might seem daunting, but with the dry brining method, you're equipped with a foolproof secret. This technique consistently delivers a bird that is both deeply flavorful and incredibly moist, crowned with that irresistible crispy skin everyone craves. By understanding the simple science and following these straightforward steps, you can confidently prepare a **dry brined roast turkey** that will be the undisputed star of your table, leaving you free to enjoy the company of your loved ones and the delicious fruits of your labor. Make this the year you unlock the true potential of your holiday bird – your taste buds, and your guests, will thank you.